
Introduction
This manual provides detailed instructions for the setup, programming, and testing of crane systems. It covers essential procedures from initial safety setup to final mechanical installations. The guide is designed for qualified technicians and includes critical steps for transmission testing, software programming, brake adjustment, and mechanical assembly. Each procedure is carefully sequenced to ensure proper system integration and operational safety.
-
-
Before installing the safety platform: Verify the left side hood door is closed
-
Move platform to machine and position it appropriately
-
Safety Critical: Lock the caster wheels to prevent platform movement
-
-
-
With the crane running, shift transmission into forward gear
-
Progress the crane through speeds 1-3 in forward gear
-
Repeat the speed progression procedure in reverse gear
-
Place crane in neutral and select 4X4 mode
-
Progress through all speeds in 4X4 mode to verify operation
-
-
-
Using the Production Test Procedures, bring the transmission up to temperature
-
Record the temperature readings in the appropriate documentation
-
Important: Follow all temperature specifications listed in the Production Test Procedures
-
-
-
Run both front and rear winches at high and low speeds
-
Record the winch operation times in the build book
-
Ensure to test and record times for both speed settings
-
-
-
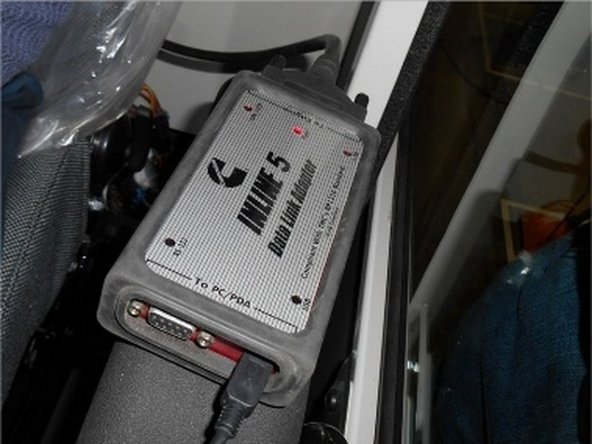
Connect the Cummins Inline-5 adapter to the ODB port on the electric box and laptop
-
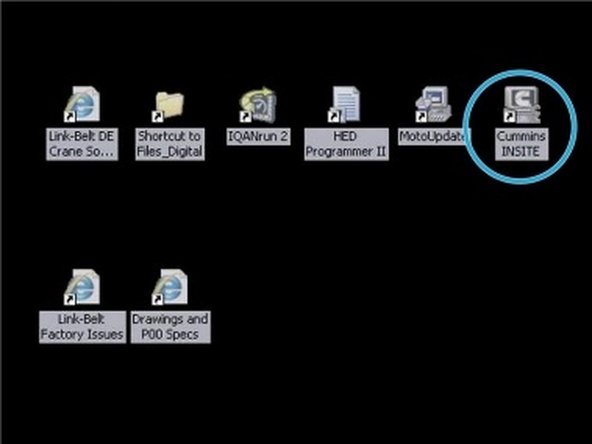
Open Cummins Insite Software from desktop and click Connect ECM tab. Follow on-screen instructions.
-
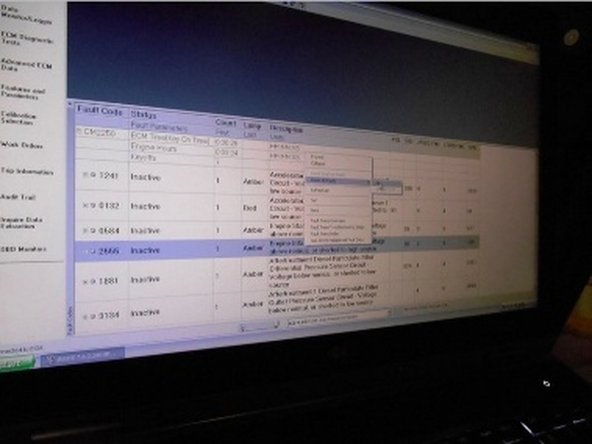
Select either "Prior Work Order" or "New Work Order" to display the fault tree
-
Check for active faults in Fault Code Tab. If no active faults present, clear all codes.
-
Note: If active faults found, troubleshoot and repair before clearing codes
-
Verify throttle pedal and lock switch operation in Data/Monitor tab, then remove cables and turn off laptop
-
-
-
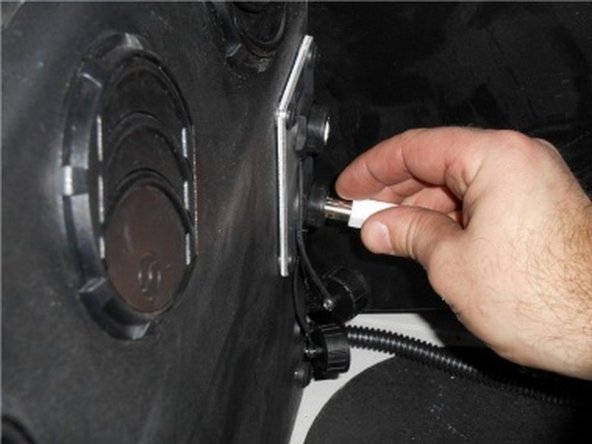
Install USB cable to IQAN port in the electric box
-
Open IQAN program on laptop and verify connection to MD3 controller - look for green 'connected' indicator dot at bottom of program window
-
Under 'System Tab', set machine ID to serial number from sales order
-
Set time and date fields, then load program 'N4Z0034_V3' under 'Update' tab
-
Configure display type on adjust screen using PIN 7411 (J9, J9XP, or Metric options)
-
-
-
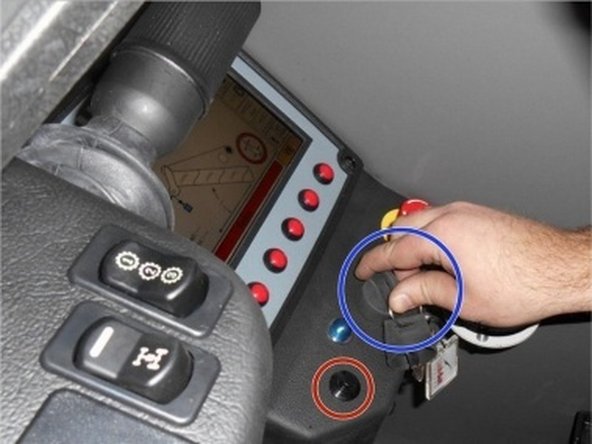
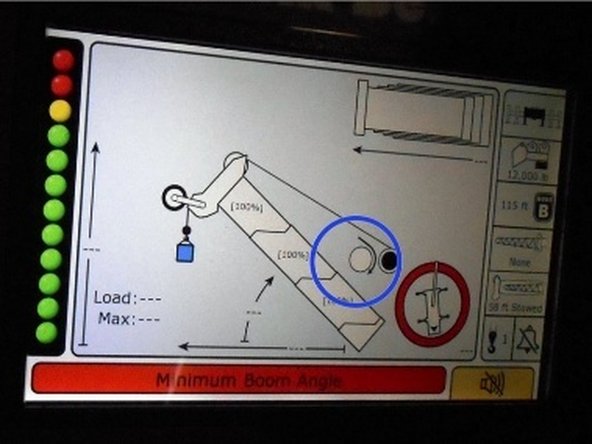
Verify all personnel and equipment are clear of the machine before starting
-
Prime the fuel filter and turn key switch to 'ON' position
-
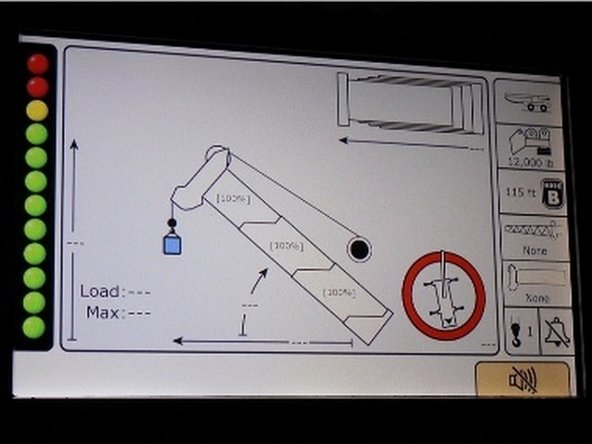
Wait for alarm to stop and display to load before proceeding
-
Start engine after sounding horn per safety procedures
-
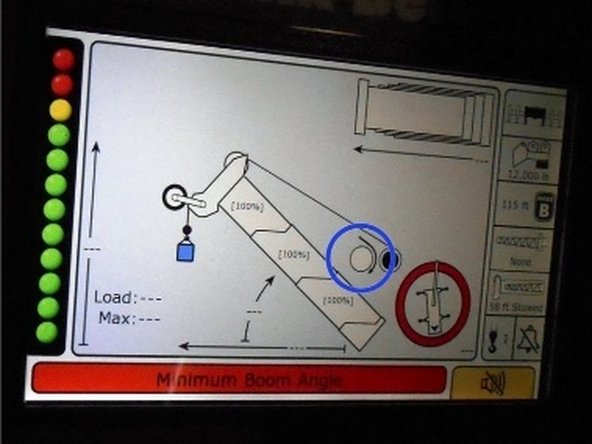
Have ground person verify no leaks or abnormal noises (hydraulic functions have 15 second delay)
-
Test winch functions: verify speed, disable functions, and correct rope direction display
-
-
-
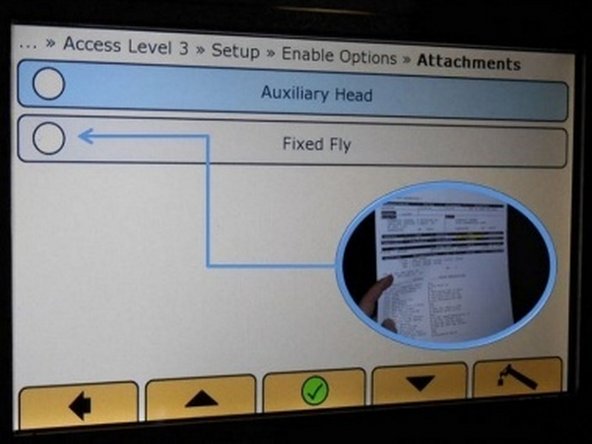
Verify options on sales order before proceeding with setup
-
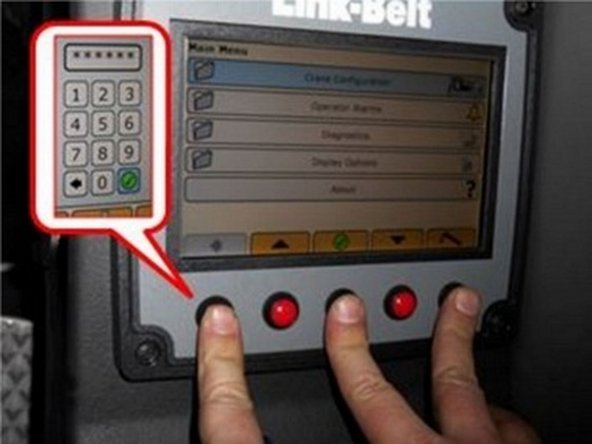
Access setup menu by pressing left, center, and right buttons simultaneously for 3 seconds. Enter password 333333
-
Navigate to Setup and select Enable Options to configure machine settings
-
Configure front and rear winch rope capacity according to specifications
-
Set machine serial number in format:
S4K4-1234 -
Ensure all options from sales order are properly configured before exiting setup
-
-
-
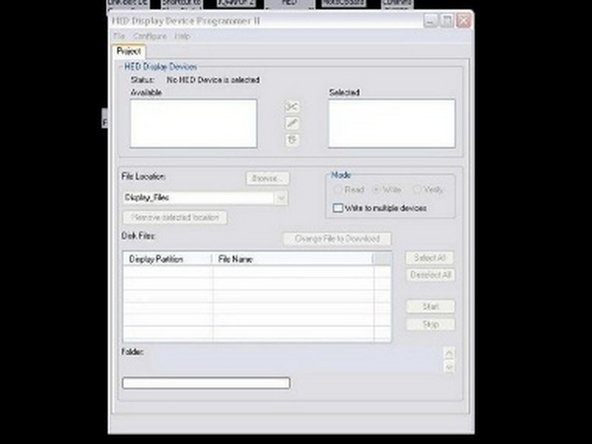
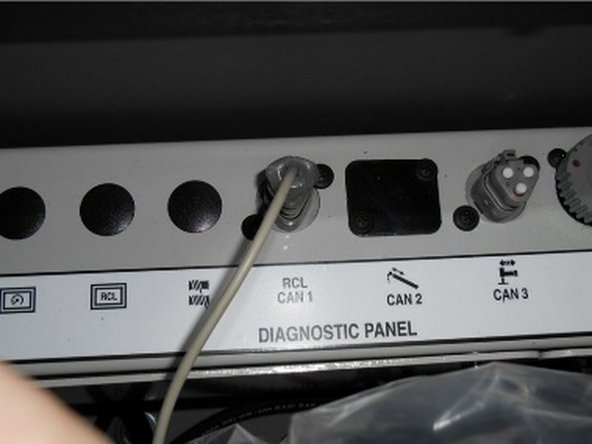
Connect USB cable to RCL port on electric box
-
Open HED program software and turn key switch in crane to ON position
-
Note: Screen will blink during this process
-
Install program on drive F:\, including `.rofms` and logo files into display
-
Remove USB cable and turn key switch to OFF position
-
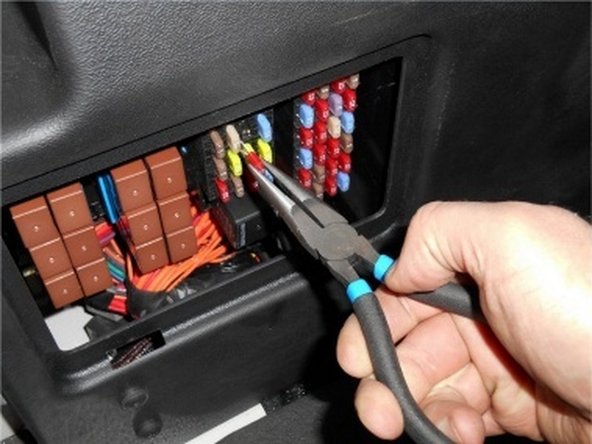
Remove 10A fuse (KK) from fuse panel for 10 seconds to reset pulse display
-
-
-
Turn key switch to ON position before beginning programming
-
Connect the license key cable to laptop and RCL port on crane
-
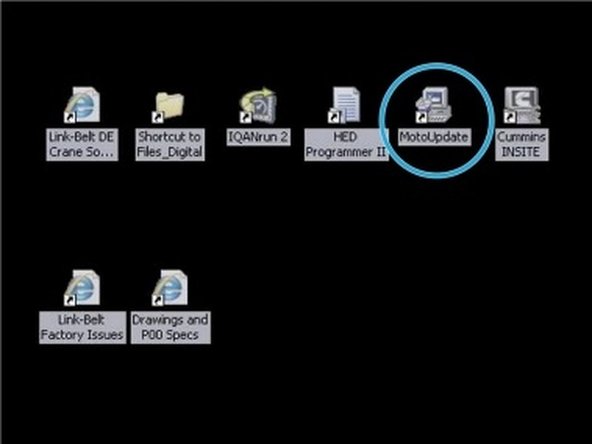
Launch
Moto Updateprogram from laptop desktop -
Install program to ECU following on-screen prompts
-
Remove cable when installation is complete
-
-
-
Start laptop and wait for boot-up (approximately 2 minutes)
-
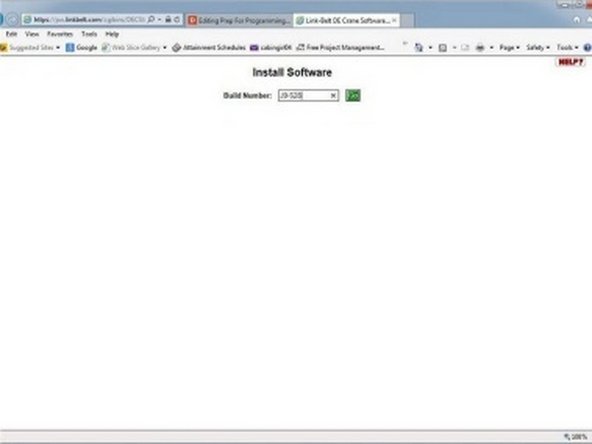
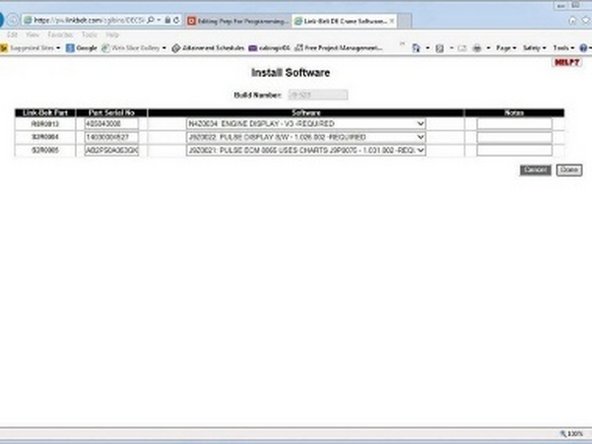
Navigate to Design Engineering Software Site and enter component serial numbers (5 minutes)
-
Download all required software packages (4 minutes)
-
Transfer '.rofms' and logo files to 'files_digital' folder on desktop
-
Important: Reference sales order to verify all required options
-
-
-
Important: Follow ground person's commands throughout this procedure
-
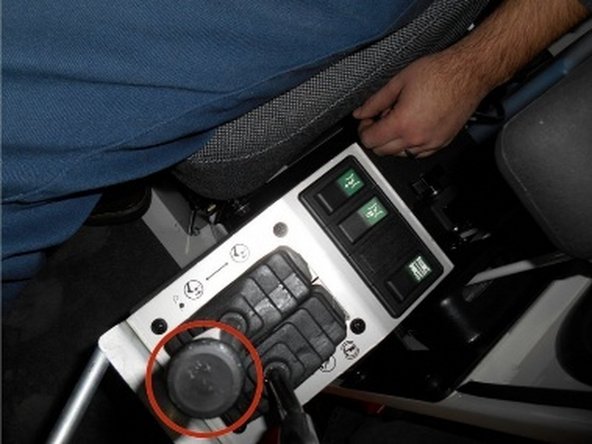
Disengage park brake and hold the service brake
-
Shift the machine into 4X4 mode, forward, 3-speed
-
Engage the park brake
-
Adjust the air gap according to specifications
-
-
-
With assistance from ground personnel, depress and hold the service brake pedal for 8 minutes
-
Release the brake pedal and allow system to normalize for 1 minute
-
Always follow ground person's commands during this procedure
-
-
-
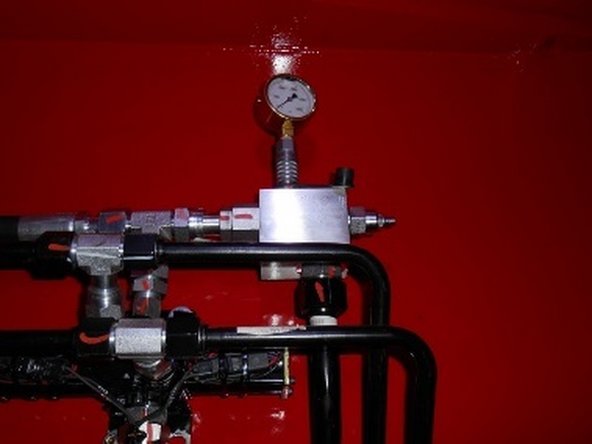
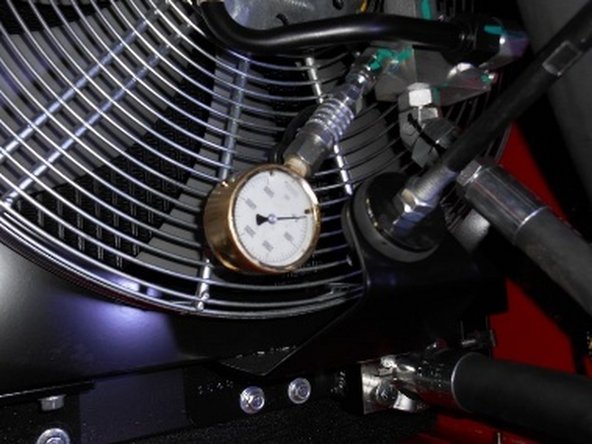
Using the Production Test Procedures, set the carrier relief and hydraulic cooler fan pressures
-
Be mindful of the ground person's commands during this procedure
-
-
-
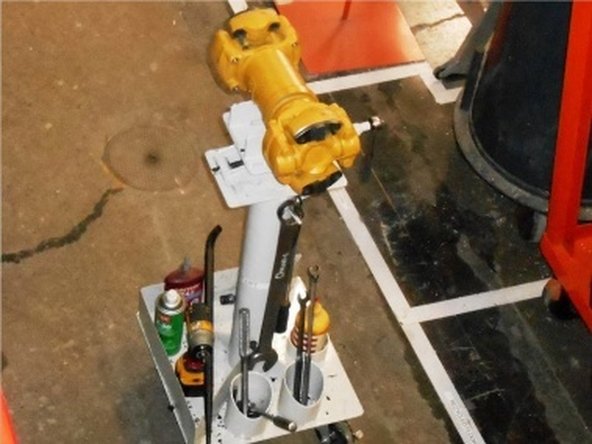
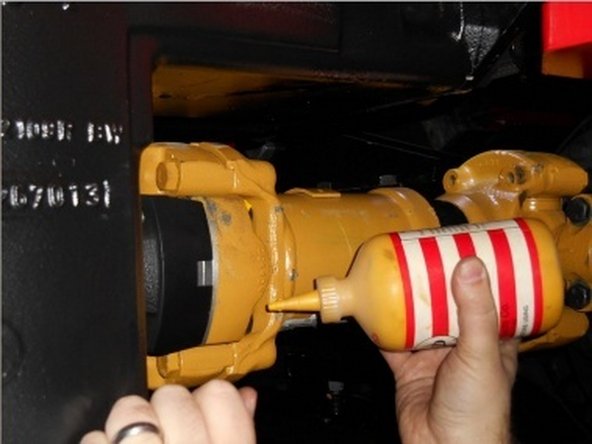
Position drive shaft under crane using rolling fixture
-
Use jack to raise drive shaft into position for bolt installation
-
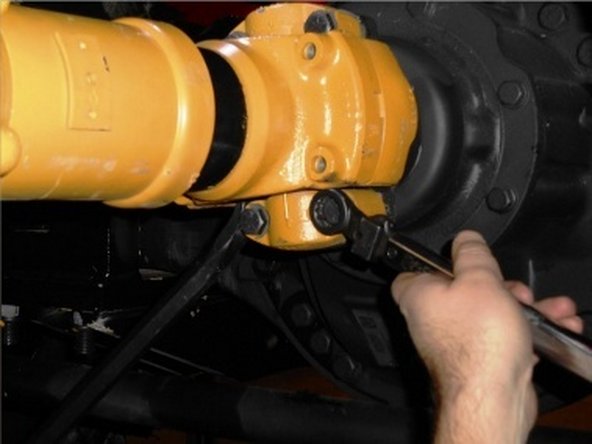
Install 4 bolts with impact wrench
-
Important: Using calibrated torque wrench, torque each bolt to specified value and apply torque seal
-


Following these procedures ensures proper crane setup and operation. Key points to remember:
- Always verify safety measures before starting any procedure
- Double-check all software programming and parameters
- Confirm all mechanical installations meet torque specifications
- Document all settings and test results in the build book
For optimal performance and safety, follow all procedures exactly as outlined and maintain proper documentation of all completed steps.

Team
